
The Messenger User Interface is designed pretty much like other Messenger Apps as well.
Installation [Windows]
To install the Dead Drop Messenger, unzip the downloaded file to a folder of your choice and start the DeadDropClient.exe. That is it!
However, if you like you can of course create a shortcut to the exe file
Installation instructions for other OS will follow as soon as I publish those Versions
First start
At the first start you have to register your Client against the Network. Therefore you have to enter a client Name and a nick name.
However, both information does not have to identify you, you can freely choose those Names. The dead drop server will not log any other information about your client then the name and internal name. No IP adresses, Browser tags or cookies will be stored.
The nickname can also be changed later freely at any time
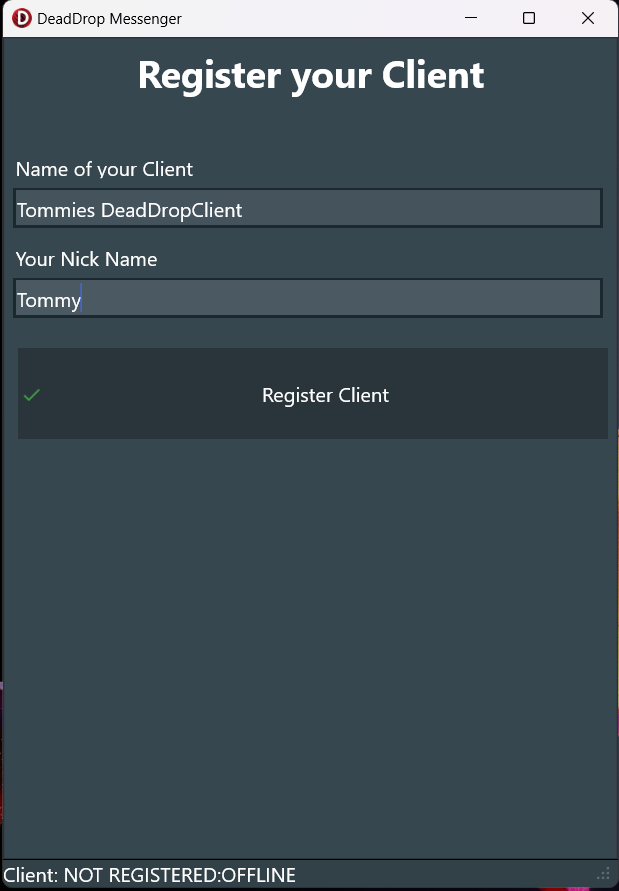
Fill out the two fields and click “Register Client”
The Drop Page
After starting the Application you will enter the Main (Drop) Page
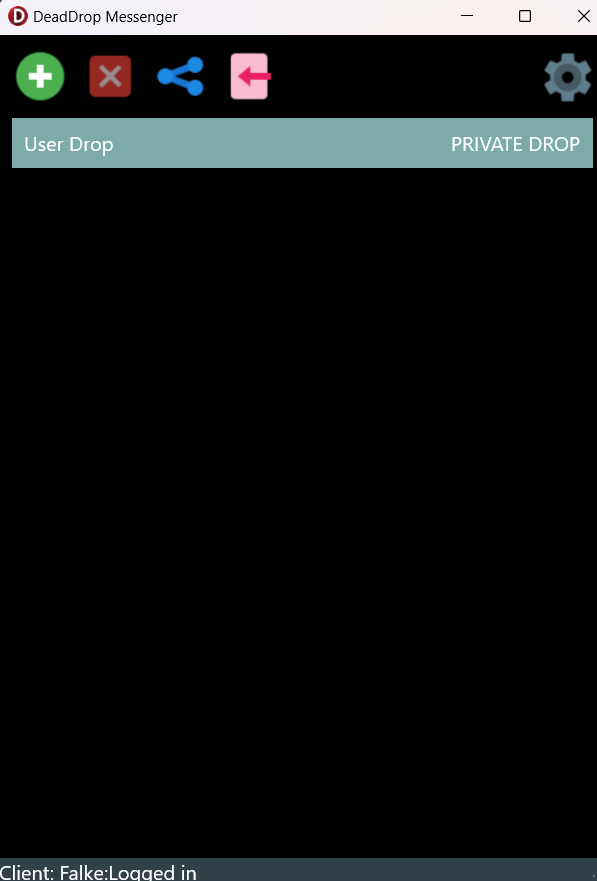
It should look like the Picture above.
In the center there is a list of Drops, that are available to you. One Drop, the User Drop will already be available. Any Deaddrop User cabn read and write into this Drop.
On the Top there is a Button Bar, that offers you the functions
Add Drop, Delete Drop, Share Drop, Import Drop and Settings
Reading and writing Messages:
To read or write messages you can simply select the drop from the List

And you get to the messages page that looks like this

You can enter your Message in the Edit Box in the bottom and send it with enter or by clicking the send button.
If you want to check for ne messages, click the reload button and if you are done with this drop click the back button
Adding a Drop
If you choose to add a new Drop you come to the following page:
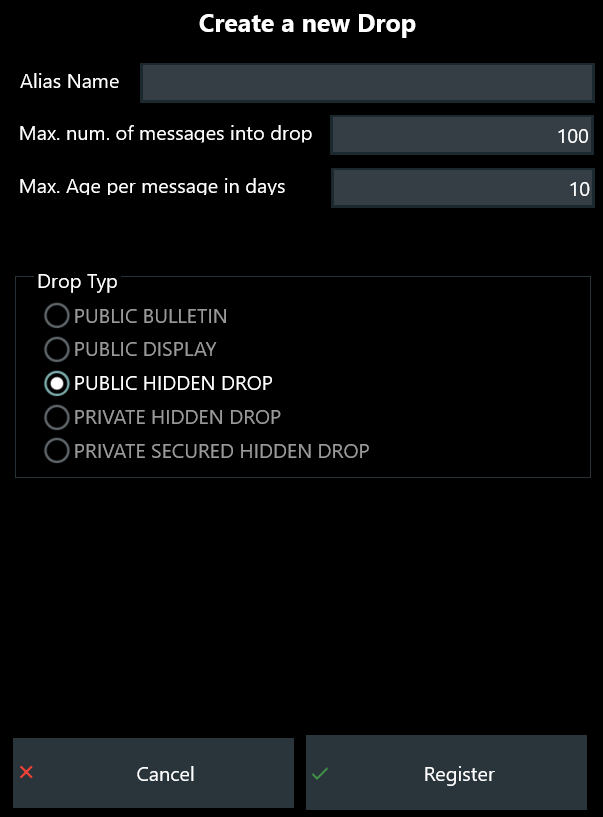
You have to enter an alias Name for the new Drop. You can freely choose the Name for your Drop.
Next you can change the properties of this drop:
“Max, num of messages into drop” limits the number of messages that can be left into a drop at the same time. It must be an ordinal number between 1 and 100. If you have other needs, contact me.
“Max age per message” defines how long a message keeps stored into the drop. It must be an ordinal number between 1 and 10. If you have other needs, contact me.
Finally, you can select the type of the drop. The Drop type defines the level of security and publicity of a drop. I will describe the different Types at another page.
However, in the current Version only the type PUBLIC HIDDEN DROP is allowed. If you have other needs, contact me.
If you are done click “Register” to save the client or “Cancel” to break the action
Share a Drop
Now that you have created your drop, you will be the only person to read and write into this drop. To share your drop with other click the Share Button
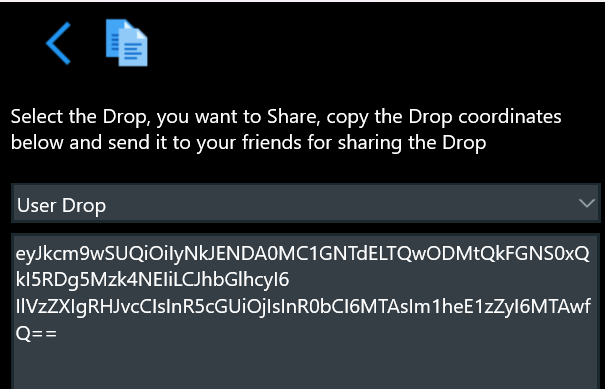
At the share Page you can select the drop, that you want to share. If you have selected the right one, you can copy the drop coordinates into the clipboard and share it to others in what way you ever want to, by mail, other messengers, on a usb storage, by Bluetooth or if you want to share your drop with a big crowd, you could also publish it on your web site or social media.
Import a drop
To Import a drop from someone else, the other person has to send you the drop coordinates (see above).
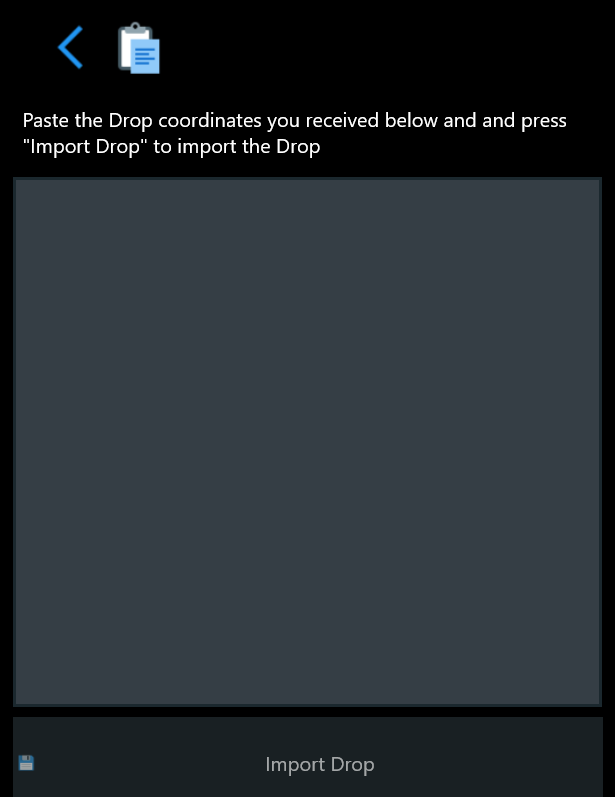
Paste the coordinated into the memo field and press “Import Drop” and you will have access to this drop as well.
If you want to talk to me via the Dead Drop Messanger: just add my public drop and post me a message.
The cordinates are
eyJkcm9wSUQiOiIyNkJENDA0MC1GNTdELTQwODMtQkFGNS0xQkI5RDg5Mzk4NEIiLCJhbGlhcyI6
IlVzZXIgRHJvcCIsInR5cGUiOjIsInR0bCI6MTAwMCwibWF4TXNnIjoxMDB9
The settings Page
Finally the settings page
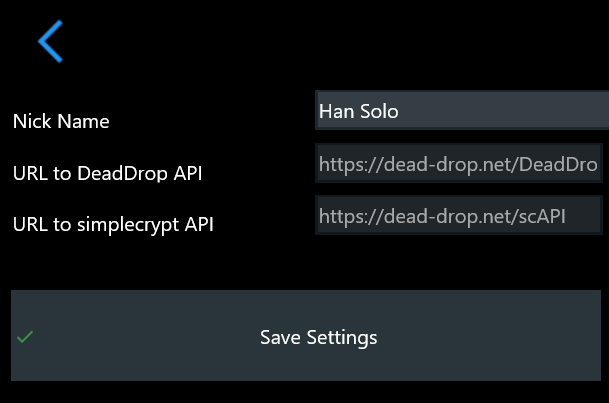
At the Moment you can only change your nick name here.
If you have the need to deploy dead drop on your own private infrastructure, contact me.